Each browser has a different method for backing up your internet bookmarks. Below are the short steps to export your bookmarks for each browser.
Chrome
- Click the vertical ellipsis, located at the top-right corner of the Chrome browser.

- Click Bookmarks from the drop-down menu.

- Click Bookmark Manager from the drop-down menu. A new Bookmarks tab will open in the browser.

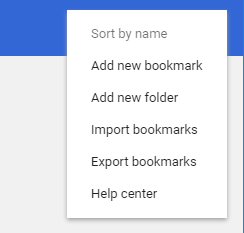
- At the top of the Bookmarks page, click the blue vertical ellipsis.


- Click Export Bookmarks from the drop-down menu.
Chrome exports your bookmarks as an HTML file. Use this file to import your bookmarks into any browser.
Firefox
- Click the history icon, located at the top-right corner of the Firefox browser.

- Click Bookmarks from the drop-down menu.
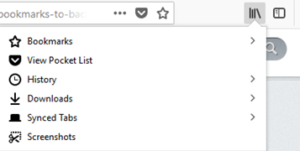
- Click Show all Bookmarks. A new Library window will open.
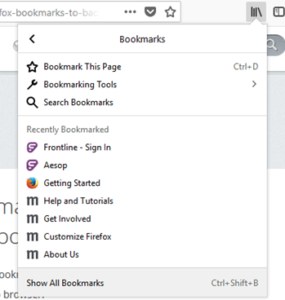
- From the toolbar on the Library window, click Import and Backup and choose Export Bookmarks to HTML…. A new Export Bookmarks File window will open.

- In the Export Bookmarks File window that opens, choose a location to save the file, which is named bookmarks.html by default. The desktop is usually a good spot, but any place that is easy to remember will work.
- Click the Save button. The Export Bookmarks File window will close.
- Close the Library window.
Your bookmarks are now successfully exported from Firefox. The bookmarks HTML file you saved is now ready to be imported into any web browser.
Edge
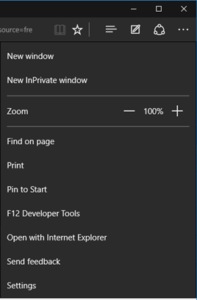
- Click the ellipsis, located at the top-right corner of the Edge browser.

- Click Settings from the drop-down menu.
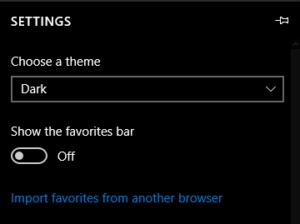
- Click Import from another browser.
- Click Export to file. A new Save window will open.
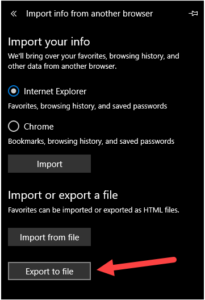
- From the Save window, save the bookmarks file to the desired location.
Your bookmarks are now successfully exported from Edge. The bookmarks HTML file you saved is now ready to be imported into any web browser.