The Problem
For some reason, our friends at Turnitin seem to have a habit of prematurely expiring courses before the end of the school year. It is assumed that expiration dates are set by default at a set number of days after the initial assignment for that class is created. As a result, you can end up providing an assignment to students, which suddenly becomes unavailable. Follow the steps below to fix this issue.
The Solution
- Visit Turnitin.com and log in with your school email address and Turnitin password. (Their password reset process is fairly easy if you have forgotten it)
- Once logged in, you should see a listing of your classes. However, this typically defaults to show only your active classes. This will be fine if your classes have not yet expired. However, to get around this, you can switch to either the “All Classes” or “Expired Classes” tab to view already expired courses.
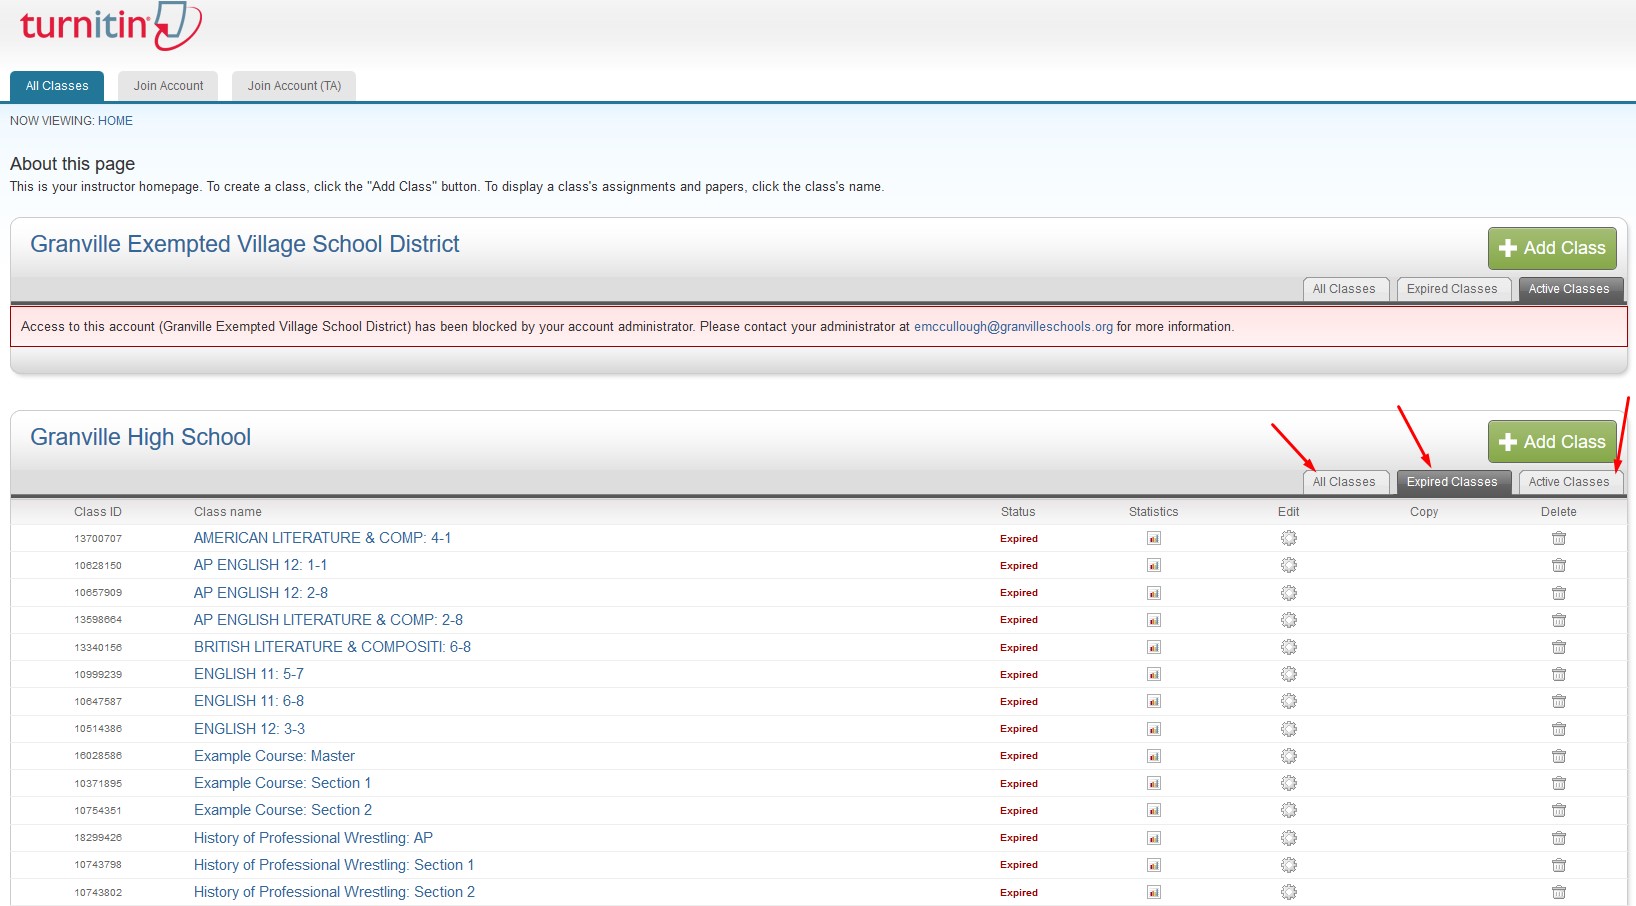
- Click on the Edit Gear next to any class for which you wish to extend the Expiration Date.

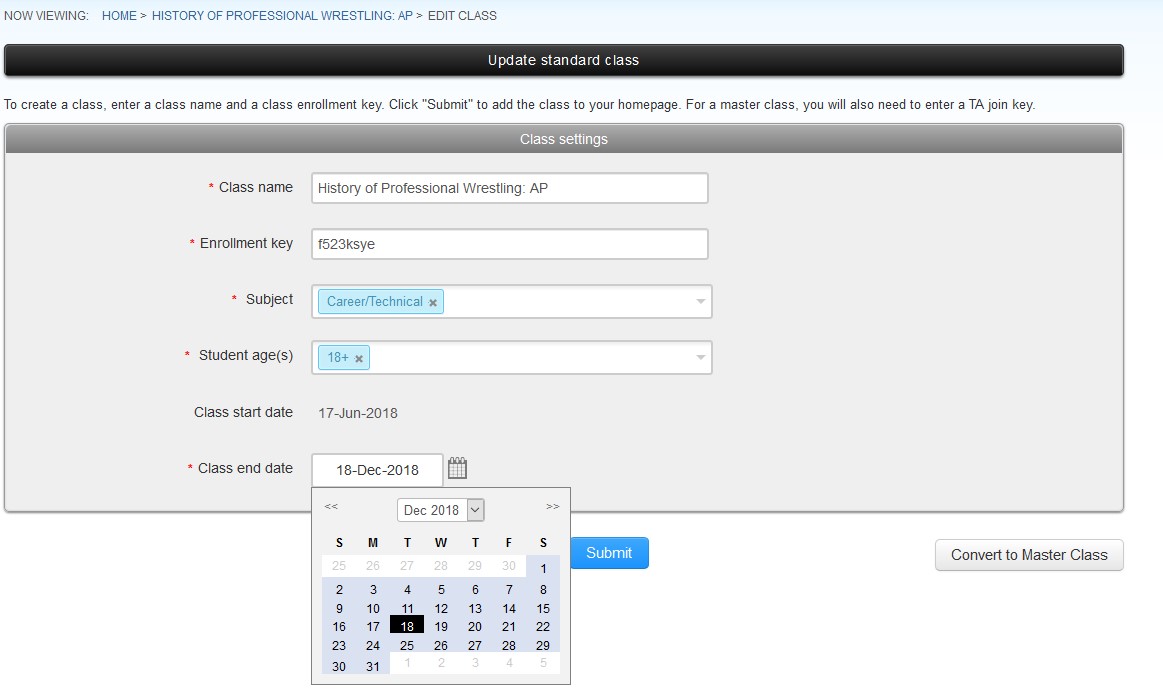
- Clicking this gear will take you to a page with details for this class. To edit your Class end date, Turnitin will require that you also enter a Subject and Student age(s), which are blank by default in our Schoology integration. Edit these fields and update the Class end date to expire beyond the end of the school year to provide a safe buffer for grading and continued access into the summer.